Here we go...lets start a garden. Im going to give you some great advise on how to build a garden.
1st Step: Location, Location
Choosing the right location will ensure the plants are getting the proper amount of sunshine. Just go outside and observe at different times of the day to see what area gets full sun. Also, there is a handy app that you can use called Sun-Seeker Lite. This will help you determine where the sun is at certain times of the day.
Just remember, you will need at least 6 hours of full sun!
2nd Step: The Zone
Determine what planting zone you are in. Dont worry, I'll explain how to do this. The zone information will {for the most part} tell you when it is safe to plant certain crops. It gives you a good starting point. The zone is based on the projected last frost date in the spring and first frost date in the fall. For example, where we are in the piedmont of North Carolina (zone 8), the date indicates that the last frost date will be April 15th. However, Im not too sure about this since it has been quite cold. I will consult my almanac and see how the weather forecast is for that week before I put the plants out. I discovered this site recently and it is very helpful plus it's free ~ Smart Gardner.
You can actually type in your zip code and it will tell you what zone you are in and what you should plant at certain times. And it can help you plan out your garden too. Its super helpful!
3rd Step: Plan
What would you like to eat this summer? Grab a piece of paper and make a list of what kind of crops you will plant. The Smart Gardner will also help you determine what you can grow where you live. I will be planting carrots, beets, spinach, peas, beans, broccoli, cauliflower, tomatoes, cucumbers, squash, zucchini, watermelon, cantaloupe, corn, zinnias, snapdragons, marigolds, bachelors button, sunflowers, asters, stevia leaf, parsley, and cilantro....I may add more, but not sure.
4th step:
Figure out what size raised bed(s) you wish to have. This will be based on the space you have available or space you wish to dedicate. And just think, if you enjoy growing your own food, you can expand in the fall or next spring. The 6 beds we, I mean my husband made are 4' x 12'. We chose 12' because boards come 12' long and that way there was less cutting. Each bed took him about 30 mins to build--amazing! He used pressure treated wood, which is very durable, but Im not too crazy about the chemicals that could leach into the soil
, so Im in the process of lining each bed with black plastic {
contractor trash bags}.
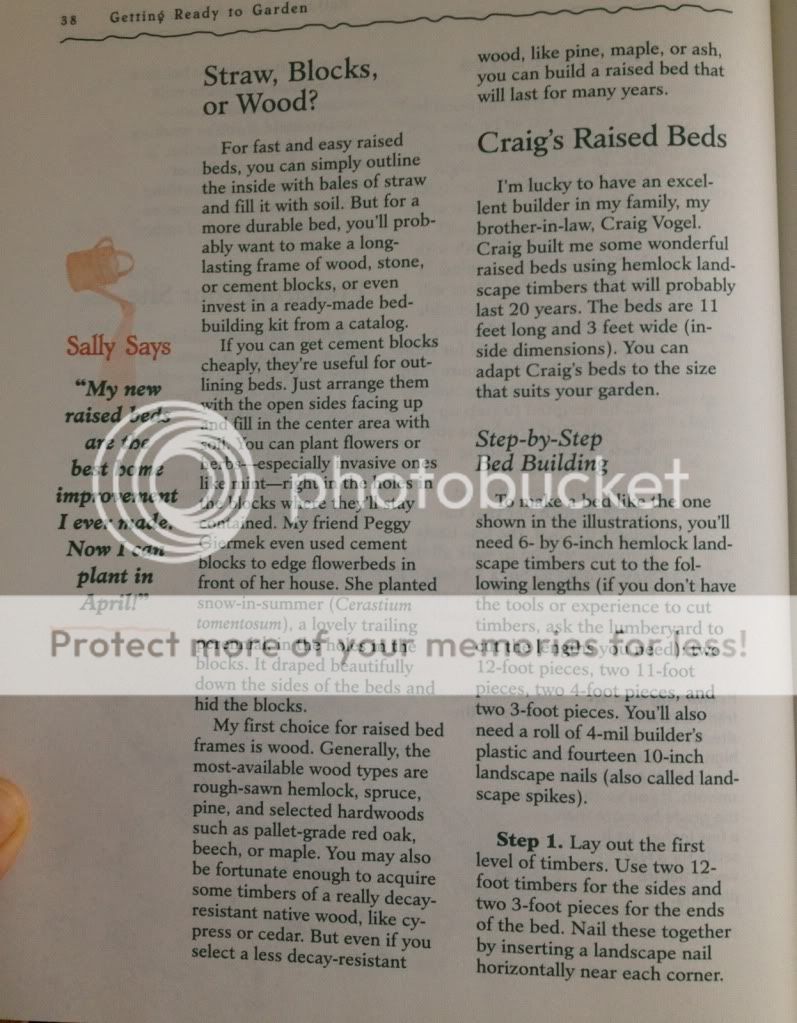
Try to use what you have for building the bed(s). Do you have a pile of lumber, bricks, huge rocks, stone, or cinder blocks laying around? Get creative. Dont use railroad ties...they have been treated with creosote, which is very toxic. Cedar or redwood is best type of
wood bec
ause it naturally resists rot and insects. If you use wood, here are
some helpful instructions on building a raised bed. Everyone learns differently, so if these instructions are a bit confusing, do a search for " how to build raised beds."
 |
| Instructions continued |
 |
| Here are the new 6 raised beds |
 |
| A close up |
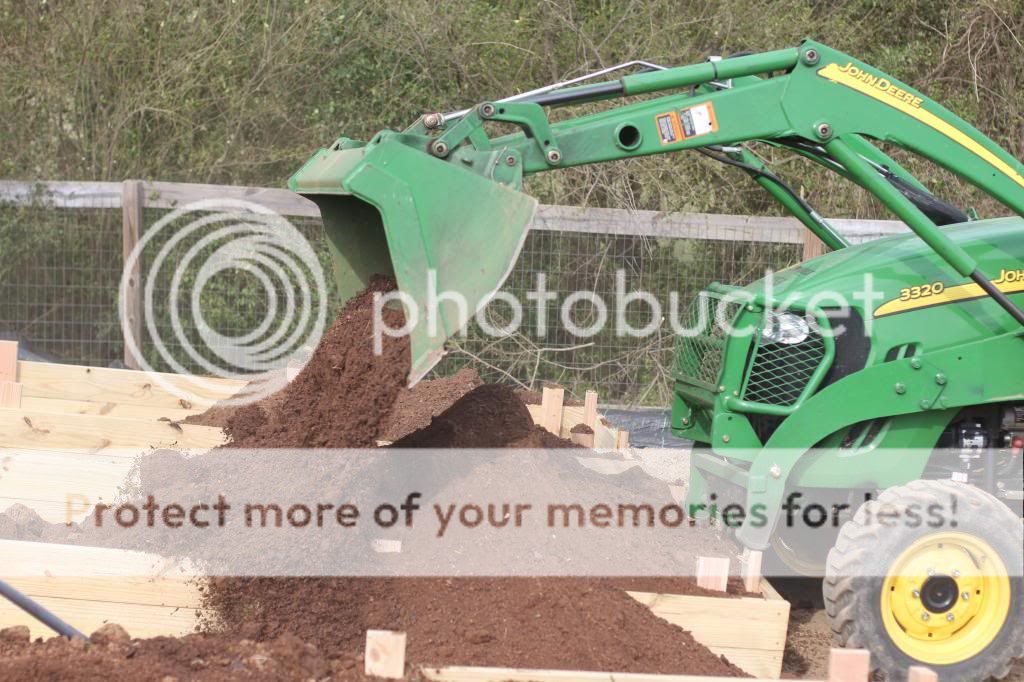 |
| Filling the beds with a mixture of clay, compost, sand and bark |
 |
| my sweet helper |
 |
| I'm lining the bed with the black plastic contractor trash bag. I used roofing nails to tack it to the wood. I used what was available in my husband's garage...no need to go buy more supplies...just use what you have |
 |
| 1 bed lined, 5 to go. And yes, I do all of this while my honey bear is right with me. She was giving me nails when I needed them, but then found a rock and started to toss it in the water-filled wheel barrel. |
I'll let you digest all of this information and we'll pick back up where we left off on my next post. I'll go over selecting seeds or plants, growing medium {dirt}, and planting. No sense in overwhelming you.
Here's what we've been doing this week....
Me and my little helper worked on the milk jug greenhouses. This allows us to get ahead on starting the seeds even though it is still too cold to plant seed directly in the ground. It seems like a brillant idea. I found the winter sowing idea here. I started the seeds on March 21st. Then planted more seed on March 25th and 27th.
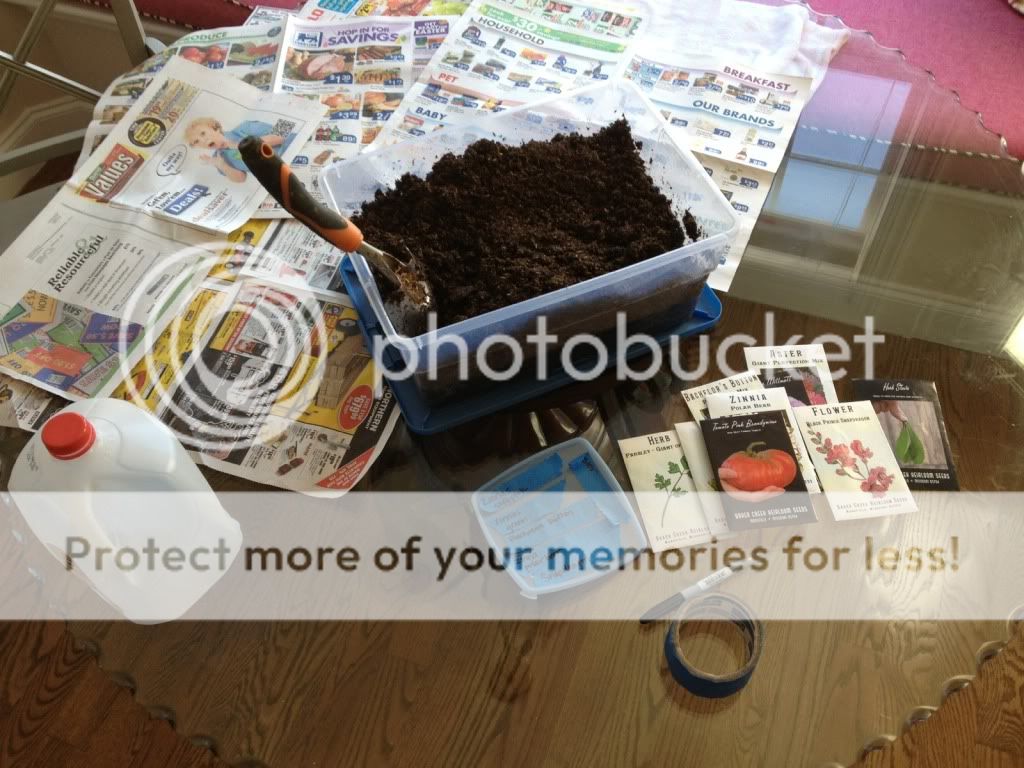 |
| Getting supplies together |
 |
| Here I go.. |
 |
| I began poking drainage hole in the milk jug |
 |
| I did it the old fashioned way because I couldnt find any of the 7 drills my husband owns. So I proceeded to heat a screw driver to make the drainage holes. |
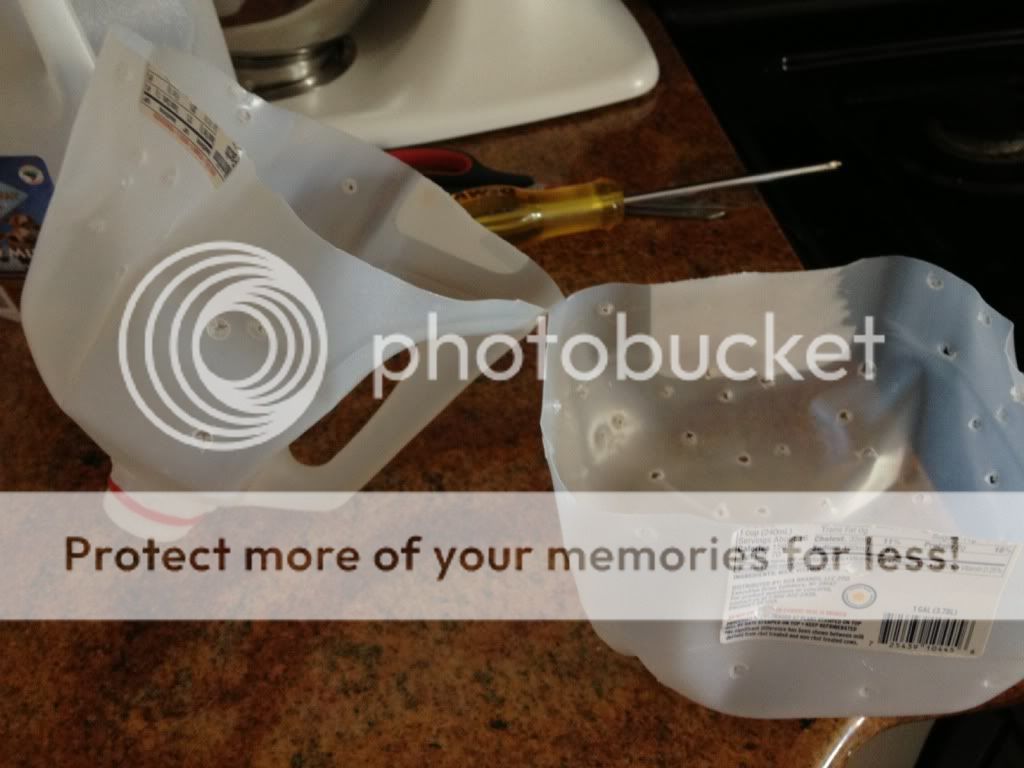 |
| Cut the milk jug and left a little hinge |
 |
| Honey bear , in her minnie mouse attire, filling the jugs with 2-3 inches of potting mix |
 |
| Planting the seeds |
 |
| labelled, taped closed and outside in the southern sun |
Do you have any questions so far? I love commen
ts, so feel free to say something in the comment box.


Great pictures and tutorial Ashley. Love that your little girl helps out ;) Family project! Can't wait to watch it grow!
ReplyDelete